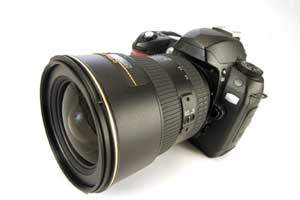
 For great photos stabilize your camera, ensure good lighting, and photograph objects at an unusual angle.High quality photographs can help non-profit organizations (NPOs) bring their stories to life in a way that engages supporters, builds relationships and improves lives. But sourcing great photos can be challenging. Few of the NPOs I know have professional photographers on staff or dedicated budgets for hiring freelancers. So photography is one of the areas where program staff, volunteers, and interns can step up, use their creativity, and really enhance the organization’s communications materials.
Here are a few tips to help you along the way if you have a digital camera and a desire to capture and share your organization’s great moments through pictures.
1. Connect with your communications contact before your event or photo opportunity to make sure you know the ground rules and policies on photography. This will also be an opportunity to gather any ideas or photography resources your communications contact can share with you.
2. Set your digital camera to take the highest resolution photos that it can. This will use a little more memory but it will allow you to have crisp images in print applications as well as in your digital materials. You can downsize high resolution images later, but if you start with a low resolution image that’s what you’re stuck with and it could look grainy in print.
3. Pay careful attention to the light. To avoid shadows and dark spots, don’t arrange the subject of your photo with the main lighting source behind them. Instead try to have light shining directly onto and illuminating your subject. Try to arrange adequate lighting for your photo so you can avoid using a flash indoors. Using a flash inside may make your photo look unnatural. If you must use the flash, be aware that the flash on most point and shoot cameras has an effective range of about 8 feet.
4. People are drawn to people. Even if you are photographing a new building or piece of equipment or other object, try to include people in your photograph because it will be more eye-catching.
5. When photographing people, close-up photos of their faces often create more visual interest and a greater sense of personal connection. Show the facial expressions and emotion of the people you are photographing to help create the overall tone and emotion for your communications piece.
 Instead of photographing a single object, place several of the same or similar objects in a grouping.
6. When photographing people, be sure to get permission first. Record the permission with your organization’s photo release form or use my sample permission forms for photography and testimonials.
7. When photographing objects, consider taking the photograph from an unusual angle to emphasize a particular aspect of the object and to create greater visual interest.
8. Close-up shots are often best when photographing individual objects. However people tend to like symmetry and repetition. Try placing several of the same or similar objects in a grouping, then focus your photo on the grouping of objects. For example at an information table, try fanning out multiple copies of the same publication on the table and taking a photo. You might want to try several rows with a different publication in each row. Or, at a candlelight vigil, a whole row of votive candles might capture more interest than a close-up of a single candle. Of course, if you can include a person with the objects your photograph will have even more appeal.
 Don't centre the subject within your photograph. Place the subject to the left or right, and either above or below the midpoint.9. Try not to put the subject of your photograph in the exact centre of the shot. To add visual interest, have your subject a bit to the left or right of the centre point. And put the subject either in the foreground or background.
10. Shaky hands make blurry pictures. Stabilize your camera while you are taking photos, especially indoors, to get clear pictures. Balance the camera on a ledge, chair or other available furniture.
I hope these pointers will help you and your colleagues visually capture the great work your organization is doing. If you are a non-profit communicator planning your organization's use of photography, you may also like the article "How to Plan & Manage Photography in NPO Communications".
I would love to hear your feedback. Please feel free to share your own photography tips and resources in the comments.
*Sample photos for this article were sourced from istockphoto.com.
Download a printable PDF version of this article.
If you found this article helpful, please share it with others who might benefit from it.